Wednesday, August 6, 2014

Two Ingredient Pumpkin Brownies

This recipe caught my eye because I'm really trying to get my toddler to eat more vegetables, and if it comes in the form of brownies, so be it.  I'll take what I can get!  An added bonus is that I can eat them, too without feeling like I'm eating pure sugar.  At least there's a hefty amount of vitamin A and fiber in there that tags along with the pumpkin.  And it's ease can't be beat.  And I had both ingredients on hand, and I suspect many other people do as well.

One thing you need to keep in mind is that these are not exactly brownies.  They are, as the title says, two ingredient pumpkin brownies; that is exactly what they taste like.  They are dense, moist and have a distinct pumpkin flavor.  But that's not to say that they aren't good; they're just different.  So don't plan to serve them as a plated dessert with homemade whipped cream or premium ice cream on top.  Your guests will be..."surprised."  The flavor isn't delicate enough to qualify as dessert.  These things are sturdy and robust.  They are brownies with attitude.  I like to eat them as a snack, like a stand in for a granola bar.  They even make a good friend for a strong cup of coffee first thing in the morning.

Here they are:

One 15 oz can pumpkin
One 19 oz size box brownie mix.

Bake in a 13 by 9 in pan at 350 degrees for 25-30 minutes.

Enjoy!


Monday, August 4, 2014

Mayan Chocolate Chip Pancakes


Ever since I tasted Marcus Samuelsson's recipe for Chocolate Cinnamon bread from his cookbook Discovery of a Continent, I have been enamored with the combination of chocolate and cinnamon.   The ancient Mayans, too, were on to something good when they combined the two to make a spicy but not too sweet hot chocolate drink with cinnamon.  Apparently this is an ancient elixir that thrilled the palate of people long since past, not just me.  I love both flavors separately, but together they are heaven.  So from this tried and true marriage of flavors emerged my idea of a "Mayan Chocolate Chip" Pancake recipe.


I find plain pancakes a little, well, boring.  As cooks we do all sorts of things with cookies, breads and muffins.  But pancakes (yes, I admit, a good pancake with maple syrup and butter is pretty darn good, just very...expected) we tend to leave alone, unless we add a few blueberries or chocolate chips to the batter.  But why not get creative with them and see what we can do? With a couple tablespoons of cocoa powder and a tsp of cinnamon, as well as a hefty scoop of chocolate chips, I found a thrilling new way to make pancakes.  My daughter, almost two, agrees (no syrup necessary)!  See her mouth well smothered in chocolate?  That's from the still gooey warm chocolate chips that just barely melted.  Heaven!

To make these, I used my trustworthy old Better Homes and Gardens Cookbook recipe that makes a very fluffy, tender pancake.  Here is the recipe for these ooey-gooey breakfast gems:

Mayan Chocolate Chip Pancakes
1 3/4 cup all purpose flour
2 tbs sugar
1 tbs baking powder
1 tsp cinnamon
2 tbs unsweetened cocoa powder
1/2 cup chocolate chips
1/4 tsp salt
1 egg
1 1/2 cups milk
3 tbs oil

Directions
In a large bowl stir together flour, sugar, cocoa, cinnamon, chocolate chips, baking powder, and salt. In another bowl use a fork to combine egg, milk, and oil. Add egg mixture all at once to flour mixture. Stir just until moistened.  

For standard-size pancakes, pour about 1/4 cup batter onto a hot, lightly greased griddle or heavy skillet, spreading batter if necessary. Cook over medium heat for 1 to 2 minutes on each side or until pancakes are golden brown, turning to second sides when pancakes have bubbly surfaces and edges are slightly dry. Serve warm. 

These would be delicious with whipped cream (add cinnamon, vanilla, or cocoa powder to the whipped cream if you like), butter, or a touch of chocolate syrup.  Alternately you could sprinkle them with powdered sugar and cinnamon.  But they are perfectly good plain, too!


Friday, August 1, 2014

Blueberry Chia Pudding


Though a pudding traditionally brings to mind dessert, because this paleo-inspired recipe has no added sweeteners it can really work for breakfast, too.  The chia gives it protein, and the gelatin helps to thicken it and give it an extra nutritional boost (read here about the benefits of gelatin.  Knox Blox anyone?).  Personally, I don't really enjoy the not-completely-thickened textured of puddings that just use chia, so I decided to add gelatin as well.

Blueberry chia pudding

1/4 cup chia seeds
1 1/4 cup unsweetened almond milk 
1 packet Knox gelatin
1/4 cup water
1/2 cup blueberries, smashed
1/4 tsp vanilla extract

1.  In a large bowl, combine the chia seeds and almond milk and give it a healthy stir.  The seeds won't begin to gel until they have been sitting in the milk for a bit, so don't be surprised if they settle to the bottom of the bowl.  This is okay; you will stir again later after they have gelled.  Set your bowl of milk and seeds aside.
2. In a small saucepan, pour your 1/4 cup water and bring to a boil.  This shouldn't take long at all with so little water to heat.  
3.  Once your water boils, turn off heat and pour in the gelatin; stir until completely dissolved.
4. Pour your gelatin water into the bowl with the chia seeds and milk; stir to combine.  At this point your chia seeds will have started to gel a bit and should remain suspended in the bowl after stirring.  
5.  Stir in your smashed blueberries and vanilla, and leave to chill overnight in the fridge.  


Friday, July 25, 2014

Italian Zucchini Bake


This recipe turns out a bit like lasagna without the pasta and with more vegetables (hence the zucchini in its name).  It would be wonderful in the middle of winter with a slab of garlic bread or even served in bread bowls.  There would be nothing wrong with it, though, simply eaten as it is, heaped in a bowl.  But because zucchini is a summer vegetable, I am posting this in the middle of July.  This is an easy and healthful way to bake up dinner.  It literally has only six ingredients, most of which you should have on hand:

A 14 oz jar of pasta sauce (I used Hunt's)
three zucchini squash
1 TBS olive oil
a clove of garlic
5-6 slices of whole wheat bread
10 oz. of shredded part skim, low moisture mozzarella


Preheat oven to 350 degrees.

Toast and then pulverize bread slices in a food processor or blender until you have fine crumbs; set aside.

Slice the squash into 1/4 inch thick pieces; heat olive oil in a large sautee pan until it runs fluidly across pan; add the zucchini slices (while stirring occasionally) over medium heat until almost tender.  At this point, mince and add garlic to pan and cook until squash is tender and garlic is golden brown.


Layer the zucchini across bottom of pan evenly.  Top the zucchini with 2/3 of the mozzarella.  Top the mozzarella with 2/3 of the bread crumbs.  Pour ALL of the pasta sauce on top of the bread crumbs.  Sprinkle your reserved bread crumbs and mozzarella on top and slide into oven (uncovered) to bake for approximately 40-50 minutes, or until your dish is no longer soupy and the mozzarella is completely melted.

Enjoy!


Thursday, July 24, 2014

Lemon Summer Squash Bread

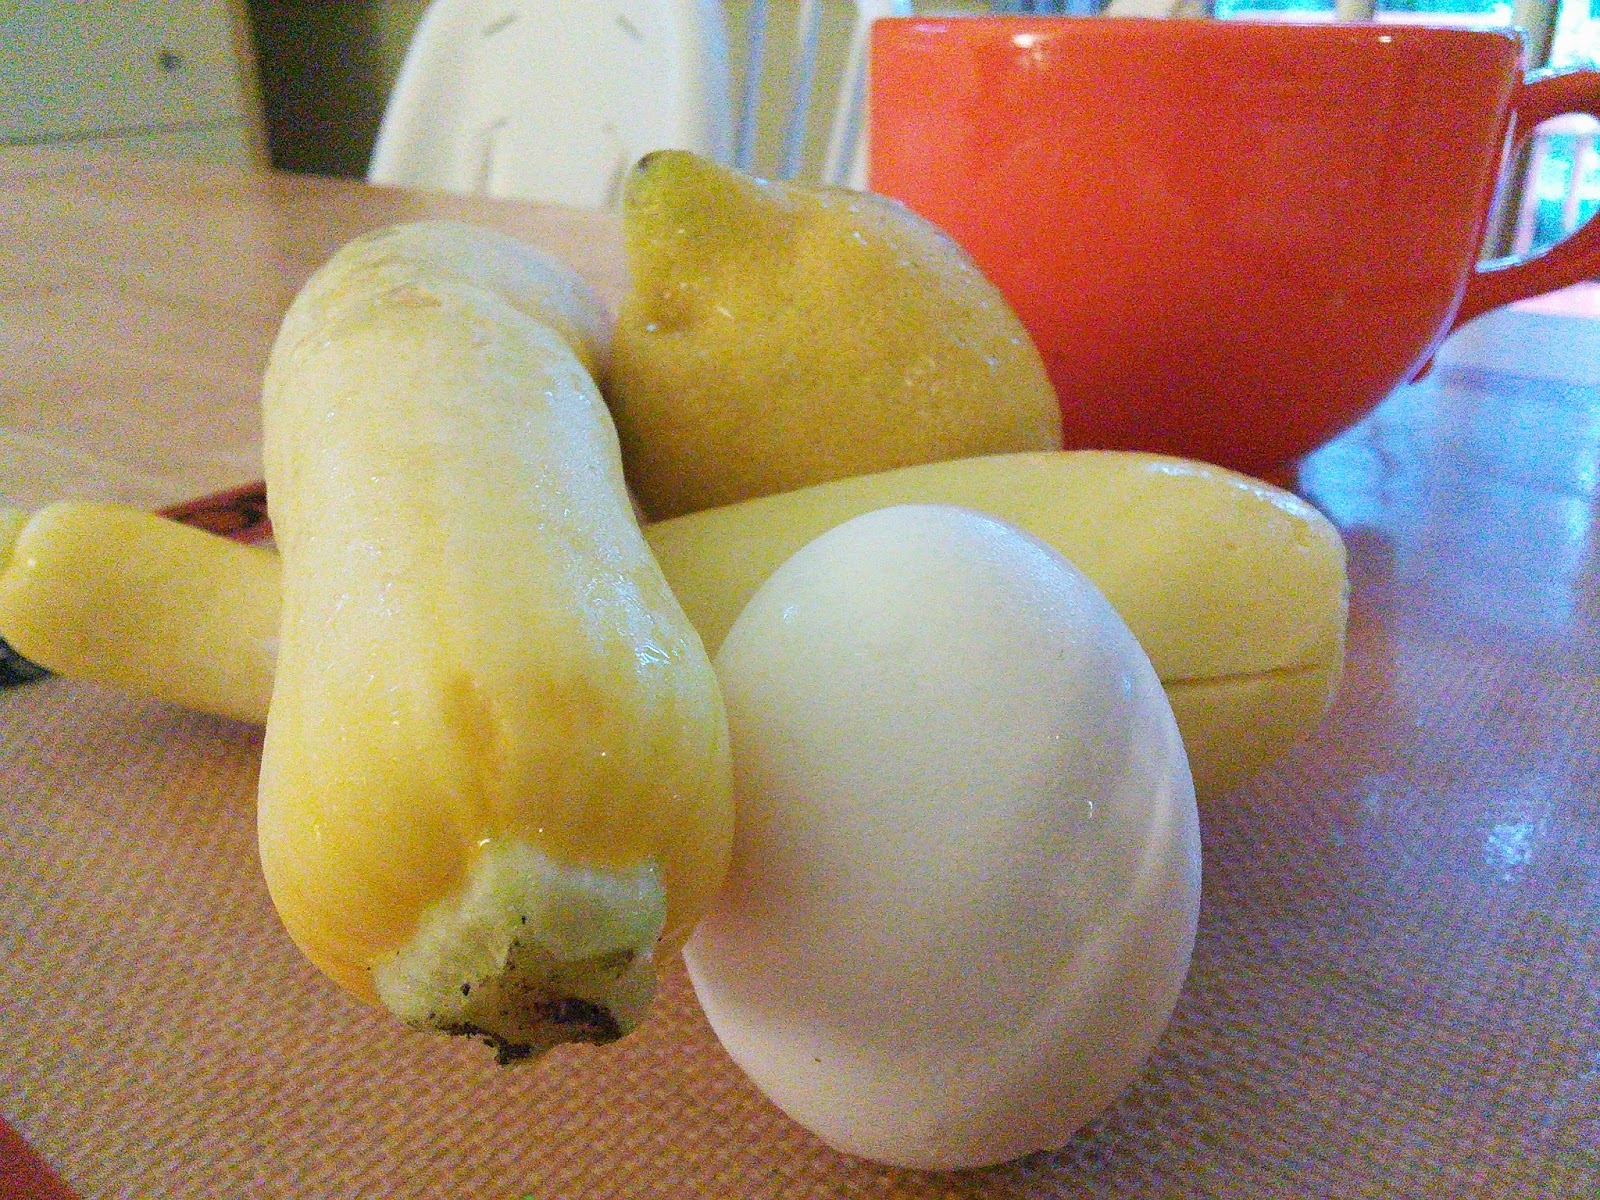
In the summer months, zucchini bread should be a staple in every house.  The shredded zucchini gives the bread the most wonderful moist texture, and the flavor is delicate enough to let the cinnamon really shine and warm the tongue.  For some time now, my mother has made a zucchini bread with lemon zest as well as cinnamon.  It gives the bread a brightness that complements the warm, earthiness of the cinnamon.  While trying to replicate the loaf she usually bakes up, it occurred to me that summer squash is hardly ever used to make quick breads.  But why not?  While zucchini is fresh and crisp, summer squash has a buttery creaminess all its own.  It seems appropriate that it is almost the exact color of butter.  And so it was that my idea to make a Lemon Summer Squash Bread was born.  I find it similar in texture to zucchini bread (both squashes impart moisture and tenderness) but, as predicted, more buttery in flavor.  You could just as well bake it using zucchini, but in my opinion the summer squash really goes well with the warmth of the cinnamon and the lemon zest.  Do as you wish, either will be wonderful!

Recipe:
zest of one lemon
1 1/2 cups shredded summer squash (about one large)
3/4 cup granulated sugar
1 egg
1/2 cup vegetable oil
1/2 cups all purpose flour
1/2 tsp salt
1/2 tsp baking soda
1/4 tsp baking powder
1 tsp ground cinnamon


Preheat oven to 325 degrees.  Either grease and flour or place a piece of parchment paper in a 9 by 5 inch loaf pan, or one of similar size.  In a large mixing bowl, mix together lemon zest, squash, sugar and oil for about one minute.

In a separate bowl, use a whisk to combine all dry ingredients; whisk until all ingredients are evenly distributed.

Slowly pour flour mixture into wet ingredients, with the mixer on medium speed the whole time.  Leave to mix until all ingredients are evenly combined and no more; you don't want to over brea the batter or it will lose its delicate texture once baked.

Pour batter into prepared pan and bake at 325 for about 55 to 65 minutes, or
until a knife inserted in the middle comes out clean.  Allow to cool completely before removing from pan and slicing.  Best enjoyed sliced, and rewarmed in the oven (or toasted), with a pat of butter on top!  Also wonderful plain, eaten as it truly is: a cake with golden flecks of squash and lemon zest.

   ENJOY.


Tuesday, July 22, 2014

Cape Breton Oatmeal Cookies

Cape Breton Oat Cakes are something my mom used to make when we were kids.  Though these recipes came to our family via my mother's side (my maternal grandfather loved these and thus my grandmother often baked them), my father's family happens to be from Nova Scotia; thus, these cookies speak to both sides of my heritage.  So, I feel a sort of kinship to these very un-fancy but thoroughly satisfying cookie wonders.  They are just barely sweet, but have a satisfying, toothy thickness from the oats and a healthy amount of butter that lends them richness.  Think of them as sophisticated granola bars; energy dense and all natural, but better for you than most commercially made granola bars because they have far less sugar.

The original recipe hails from Scotland, but rolled over to Nova Scotia with the Scottish and so is part of the culinary history of both places.  Nova Scotia (code for "New Scotland" in Latin) was settled by the Scottish in the 1700's.  Cape Breton is considered the "most Scottish" part of Nova Scotia; it is said that the hills in Cape Breton smell of single malt whisky.  Road signs there read in both Gaelic and English, and Cape Breton has been home to the Gaelic College of Celtic Arts and Crafts for just shy of 75 years.  With its Rocky Coast, you can see why the Scottish settlers must have felt that they never left home.


Cape Breton Oat Cakes actually call for shortening because of the firmness it lends them.  The traditional version is available here: Cape Breton Oat Cakes, in both sweet and savory renditions.  I decided to make these cookies with all butter instead of shortening (or shortening and butter, which some recipes use).  I had no shortening at home and thought that in any case, the butter would give them a richer flavor.  Not long into the mixing it became clear that the dough was too soft to cut into shortbread-like squares or circles, as oat cakes traditionally are.  That is how I ended up making a drop cookie version of these ancient gems.  They aren't quite oatmeal cookies (not as sweet, and they have a rich caramel flavor from all that brown sugar and butter) and not quite Cape Breton Oatcakes because they are soft, moist rounds rather than crisp, thick cracker-like entities.  Therefore, I'm naming them Cape Breton Oatmeal Cookies.    

And, drumroll, please.  Here is the recipe:

Cape Breton Oatmeal Cookies

Dry ingredients:
2 cups quick oats 
2 cups white flour
1 cup packed brown sugar (I used dark, but light would work fine)
2 tsp baking powder
1/4 tsp salt
Wet Ingredients
1 cup (2 sticks) unsalted butter
1/2 cup cold water or milk

Preheat your oven to 350.

In a large bowl, whisk together all dry ingredients until well combined.   

Cut melted butter into the flour mixture with your fingers until clumps are no longer visible and dough is even; pour cold water/milk and stir until uniform.  At this point, turn your oven on to 350.   

While the oven preheats, put the dough in the fridge to firm it up a bit.  

Once your oven is at temperature, use a large spoon to drop dough (about 2 TBS for each) onto an un-greased baking sheet.  I fit about 12 onto my sheet.  Bake the cookies in oven for about 10-15 minutes or until lightly browned on bottom.  While current batch of cookies is baking, make sure to place dough back in the fridge so it stays cold and firm.*  Using a spatula, remove from sheet to cool on a wire rack.  They are wonderful with coffee or tea, or simply alone.    

Note: These are not supposed to be crispy or chewy like oatcakes; they will be soft and moist, especially in the center.     

*This helps the cookies maintain their shape as they bake and rise well; otherwise they may spread and become thin and crispy once baked, which would be another cookie entirely.  
   

Monday, July 21, 2014

Key Lime Bars

Something about summer calls for chilled citrus treats.  When I was a kid, it was those orange and vanilla push-up pops.  Now I'm on to other things.  There are margaritas, lemonade with fresh lemon juice and actual pulp, lemon bars, and if you're willing to go out on a limb, key lime bars.  They are lemon bars' swanky unexpected cousin, and are, in my opinion, better for their slight plot twist.  You can see the picture of the key lime bar basking in all her summery goodness!      

You can also see that the crust to this bar is no lightweight.  It is a thick, buttery blend of graham cracker crumbs, sugar, butter, and a bit of cinnamon.  It is sturdy enough to hold up what can at times be a too-soft-to-cut dessert.  Not with this crust.  Notice how the bar still has a nice, crisp edge after being cut; that's thanks to its weighty crust.  If you prefer a higher filling to crust ratio (if you really like that lime tang!), simply cut the amount of crust ingredients down by a third without reducing the filling.    

These bars would be great served up with some vanilla ice cream, whipped cream, or nothing at all.  They are rich in flavor and can stand well on their own.  They are divine.  Eat them at room temperature for best flavor, but be sure to chill them after they have cooled form the oven to help them set.  And now for the recipe:

Key Lime Bars
Makes 16 small squares
Crust Ingredients:
  • 12 full graham cracker sheets (the way they come in the box), ground into crumbs 
  • ⅓ cup granulated sugar
  • ¼ tsp cinnamon
  • 1/2 cup unsalted butter, melted

Filling Ingredients:
  • 3 egg yolks
  • 1 can (14 oz) sweetened condensed milk
  • ½ cup lime juice (about 3 limes - I used bottled Key Lime Juice that a family member happened to have brought back from the Keys, but you can use fresh juice from any lime) 
  • green food coloring (optional)
  1. Preheat the oven to 350 degrees F.  Cut a sheet of parchment paper to fit inside an 8 X 8 square baking pan, so that the edges come all the way up the side of the pan.
  2. Stir together the graham cracker crumbs, sugar, cinnamon, and melted butter in a bowl with a fork until well combined. Press crumb mixture evenly onto bottom of the pan. Bake crust for 10 minutes. Remove from the oven, leaving oven on.
  3. Whisk the egg yolks for 2 minutes, then add the sweetened condensed milk and continue to whisk for another 2 minutes. Add the lime zest to the lime juice along with the food coloring (if using) and with the mixer on low, slowly add to the egg yolk mixture. Whisk until well combined, about 2 minutes. Mixture will thicken slightly when done. Pour filling into crust. Bake for 15 minutes. Cool completely on rack (the filling will set as it cools). Refrigerate for at least 1 hour, 2 - 3 for best results. Slice into 16 pieces. Serve chilled.